Session 12: Database Integration with BDD
Objectives
- Installation of MySQL Database
- Establishing JDBC Connection
- Demo: Test Case Automation with Database Integration
- @Before and @After
- Screen Shot
Project URL:
Hybrid Framework with Database Integration:
https://github.com/stinepurification/Session12DatabaseIntegration.git
Installation of MySQL Database: https://www.youtube.com/watch?v=WuBcTJnIuzo
1. Go to https://dev.mysql.com/
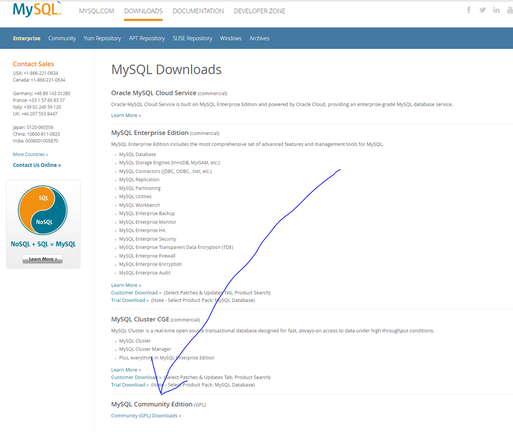
2. Click on Download Tab
3. Scroll down to click on Community Downloads
2. Click on Download Tab
3. Scroll down to click on Community Downloads
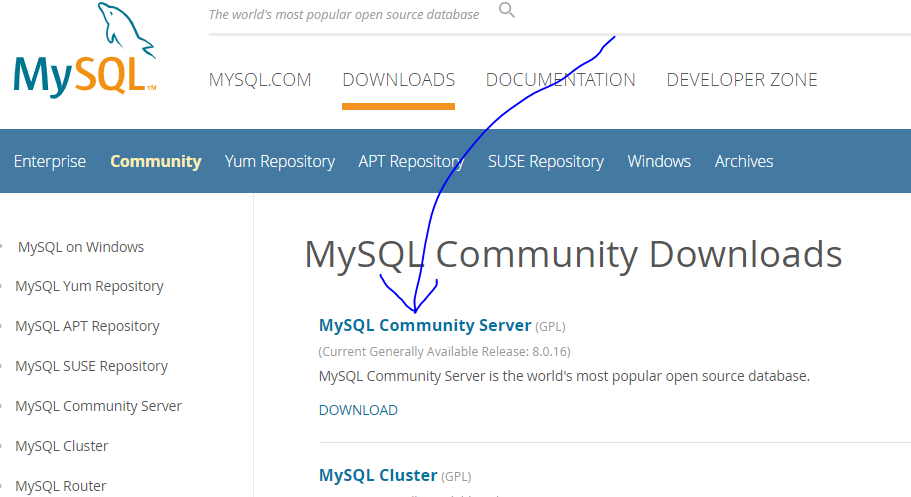
4. Click on MySQL Community Server
5. Scroll down to select a platform and click Go to Download Page
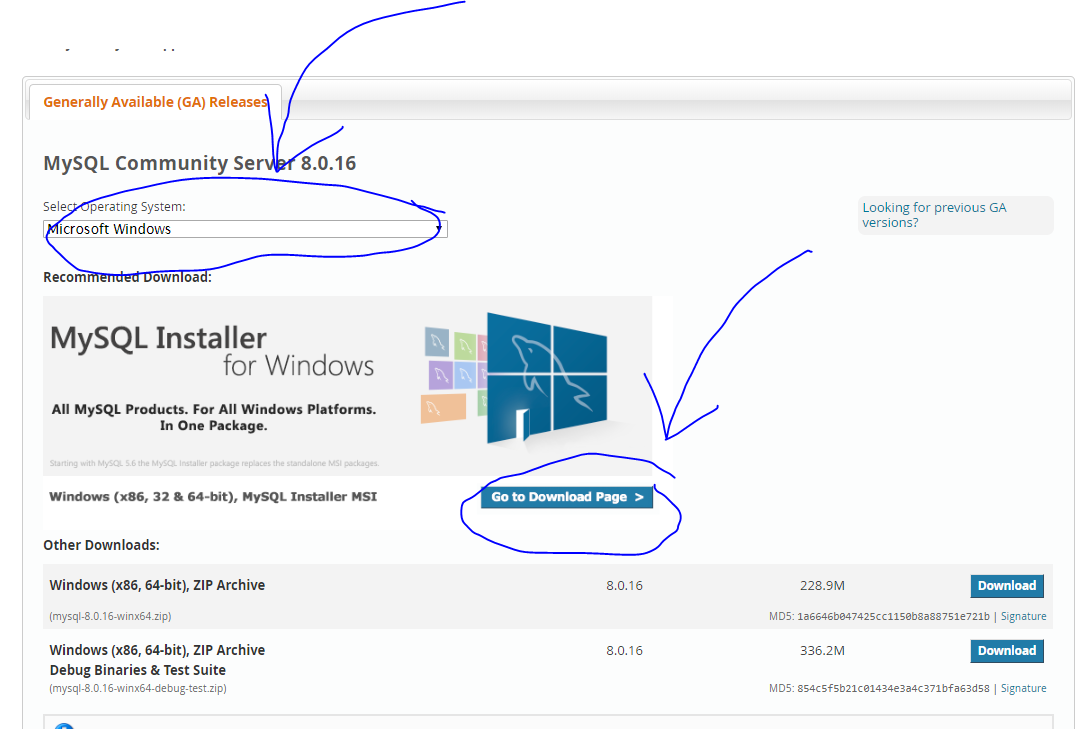
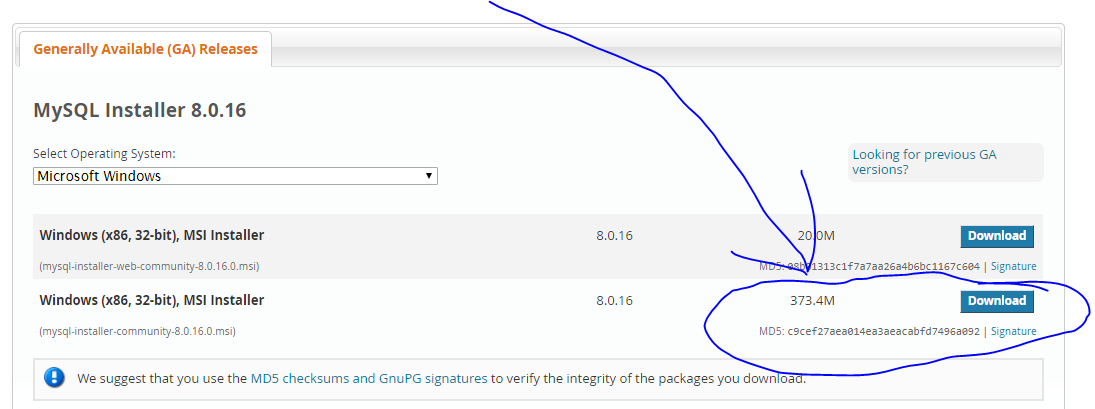
6. Scroll down to click on the second Download button
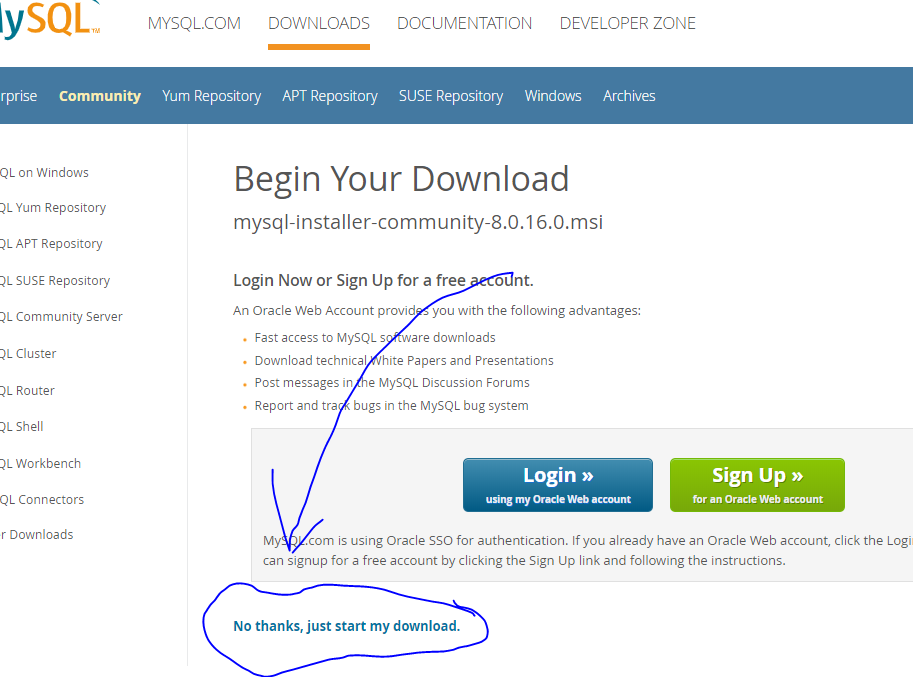
7. Click on No thanks, just start my download. Or Start here: https://dev.mysql.com/downloads/file/?id=488055
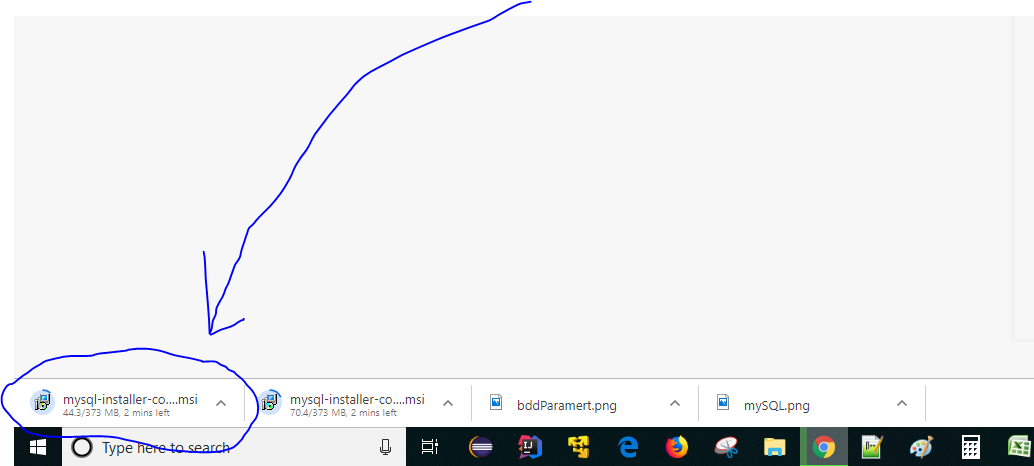
8. Click on the file after download complete,
9. Allow access to change windows and accept License Agreement to click next,
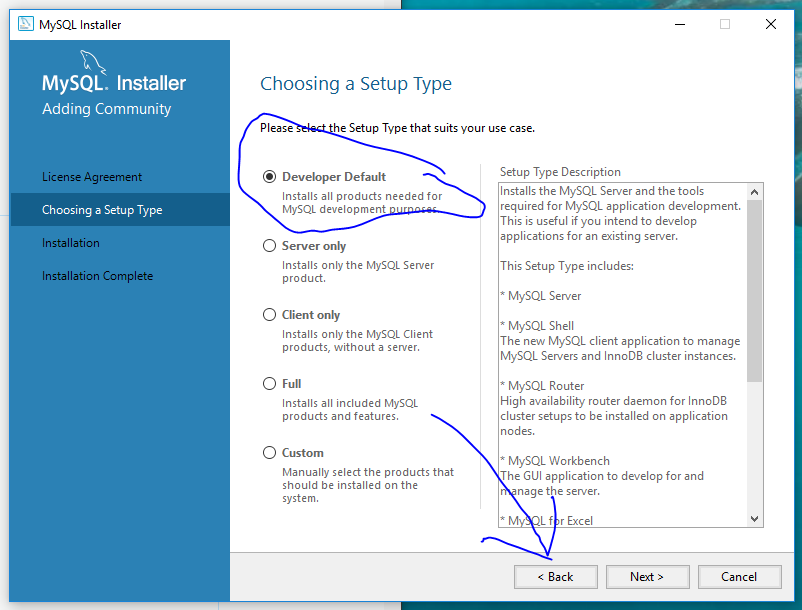
10. Select Developer Default to click next,
10. Select Developer Default to click next,
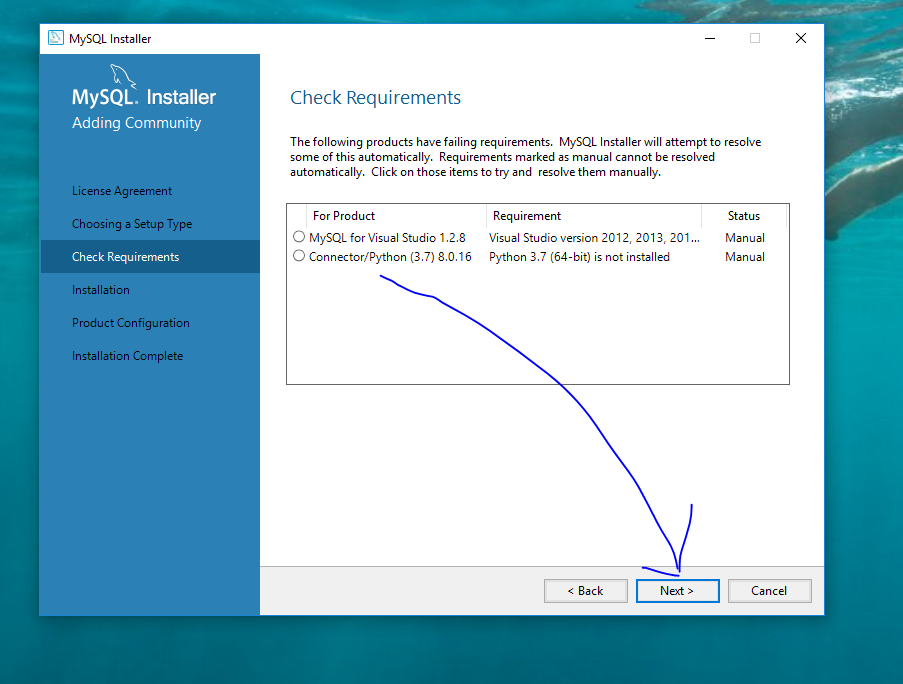
11. Check Requirements: Select next,
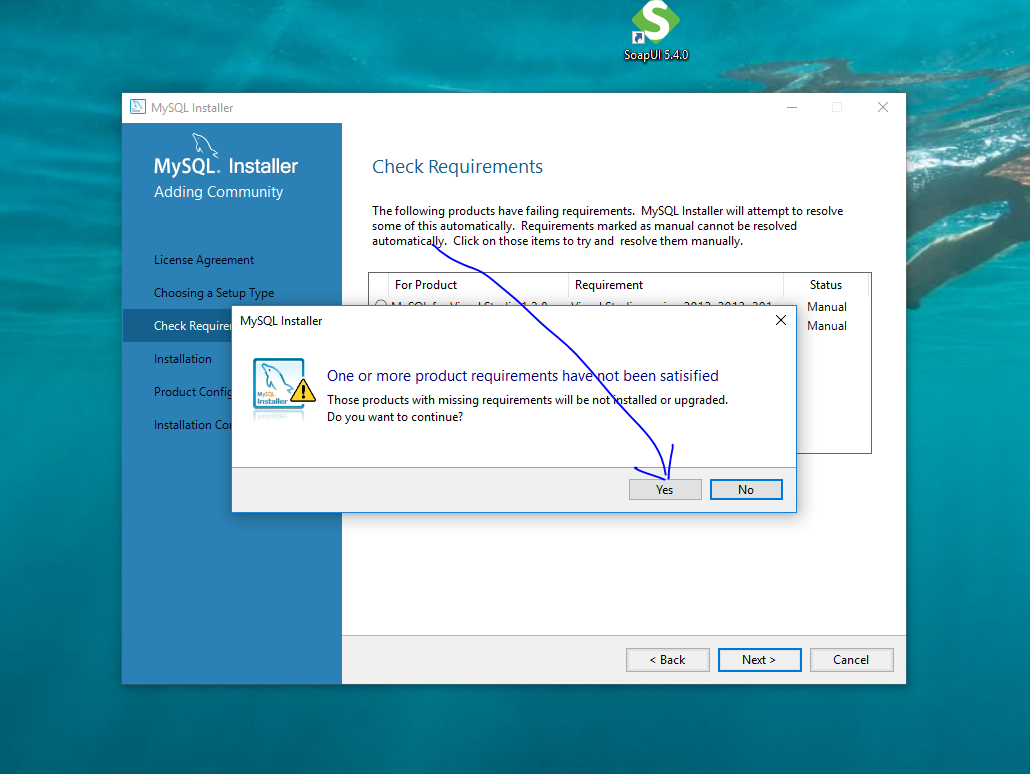
12. Click Yes,
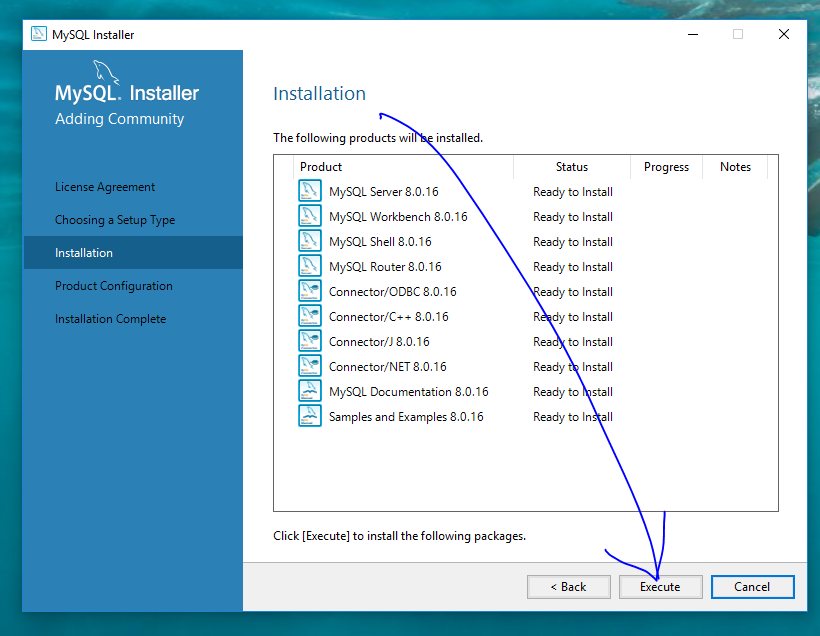
13. Installation Window: Click Execute,
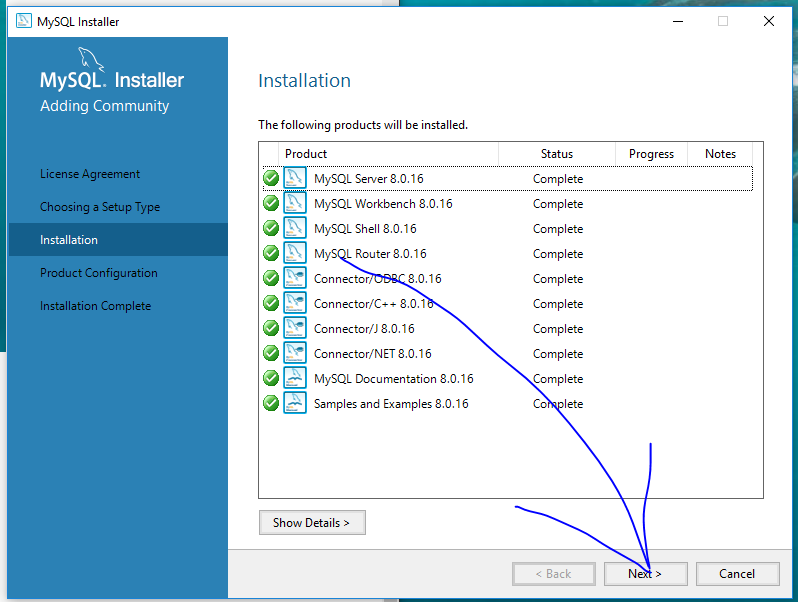
14. Click Next,
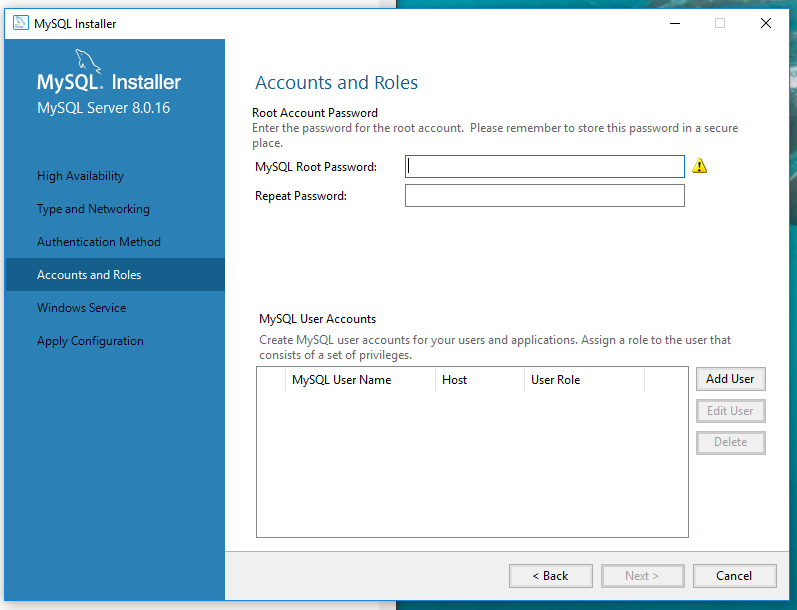
15. Continue clicking Next until you see Accounts and Roles window. Provide a password.
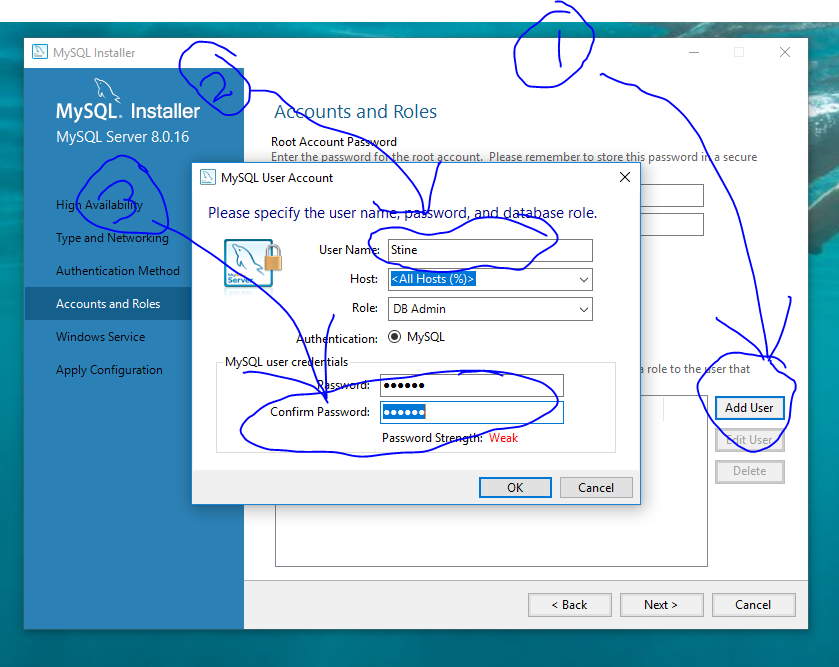
16. Click on Add User, provide username, and password. Then click next.
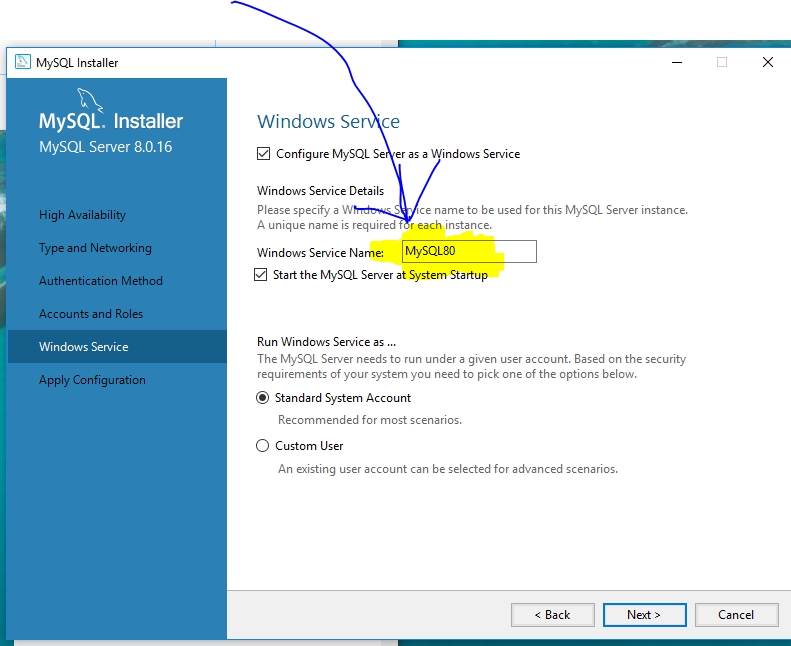
17. Notice Windows Service Name and click next,
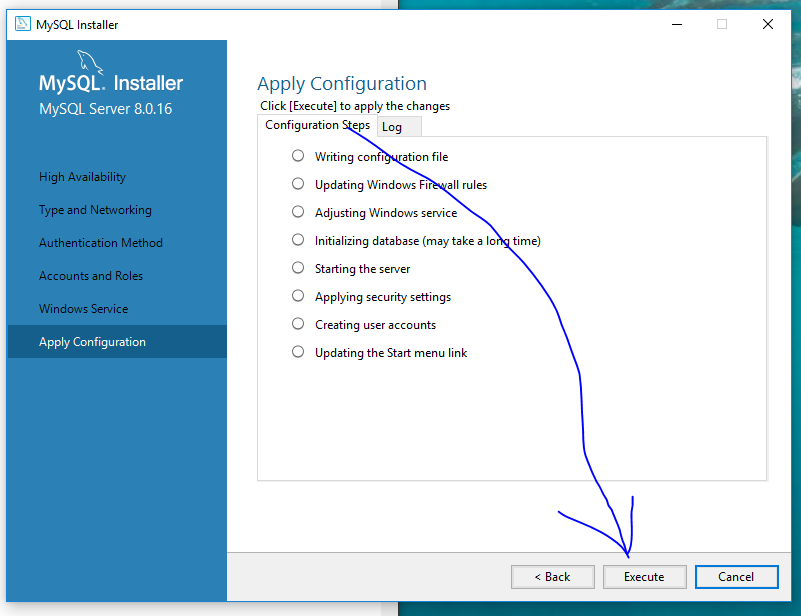
18. Click Execute, then Finish.
19. Continue selecting default settings/configurations to get to the below window to click Finish,
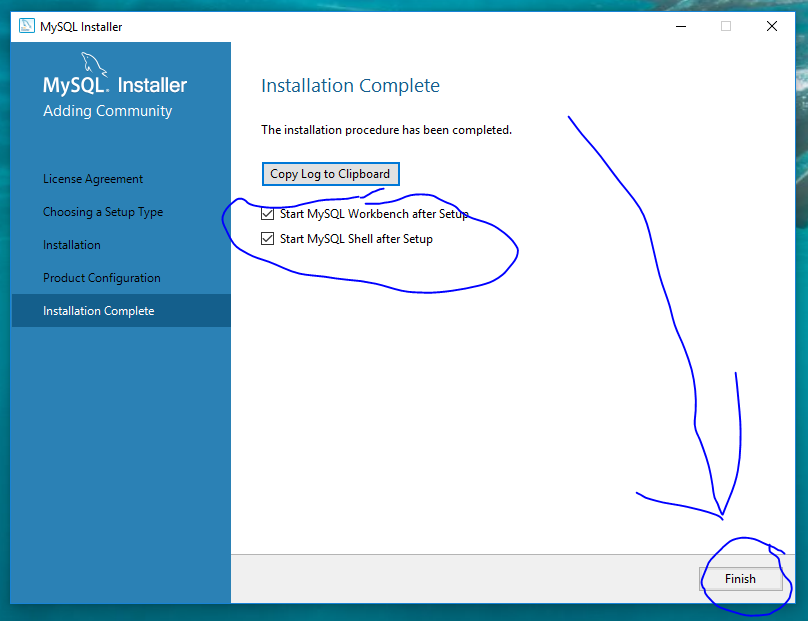
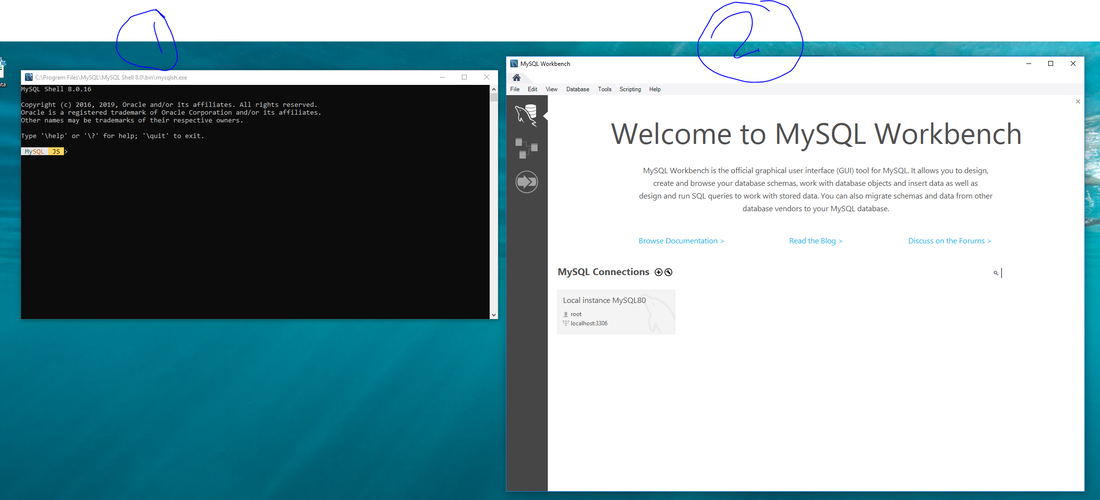
20. MySQL Shell and Workbench will open.
Create a Database:
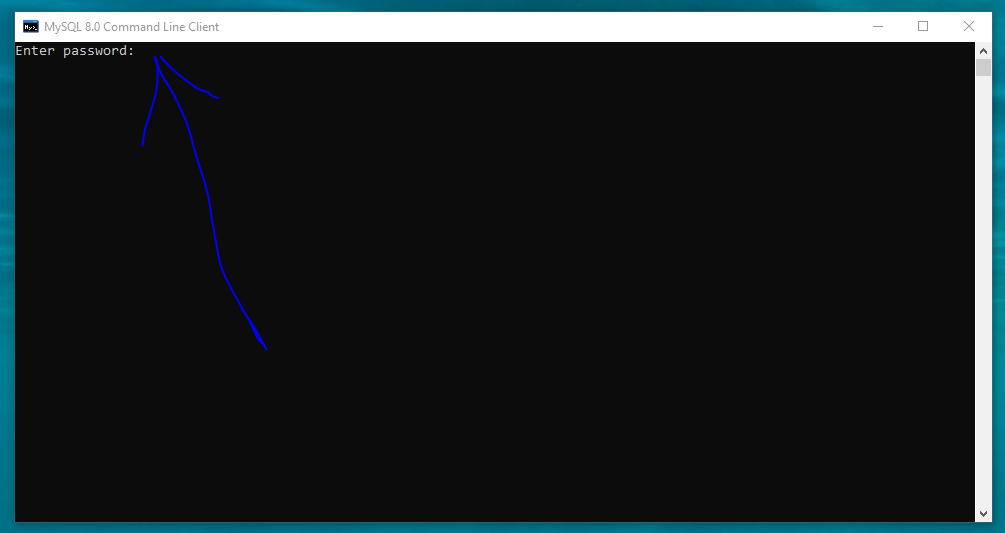
1. Open programs menu to expand MySQL folder to click on MySQL Command Line Client,
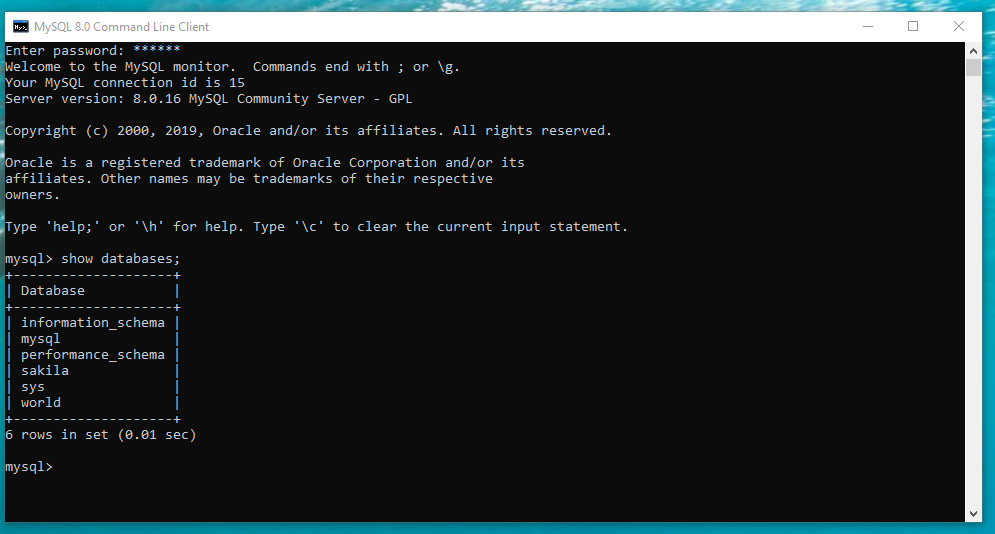
2. Enter root password,
3. Type> show databases;
1. Show a table from a database:
Type> use world; - Accesses the world database
Type> show tables; - Displays all the tables
Type> select * from country - Displays all the records from the table country
2. Create a database:
Type> create database TechFios; - This will create a database called TechFios
Type> use TechFios; - Accesses the database
Type> create table users (username varchar (50) not null, password varchar (50) not null);
- This will create a table with username and password columns
Type> show tables; - Shows all tables
Type> describe users; - Shows the structure of the table
Type> insert into users values ('[email protected]', 'abc123'); - Input table values
Type> select * from users; - Displays the created table
Steps to establishing JDBC Connection and fetching data from MySQL Database
1. Add the following dependency to your existing maven project:
<dependency>
<groupId>mysql</groupId>
<artifactId>mysql-connector-java</artifactId>
<version>8.0.16</version>
</dependency>
2. Update Maven project,
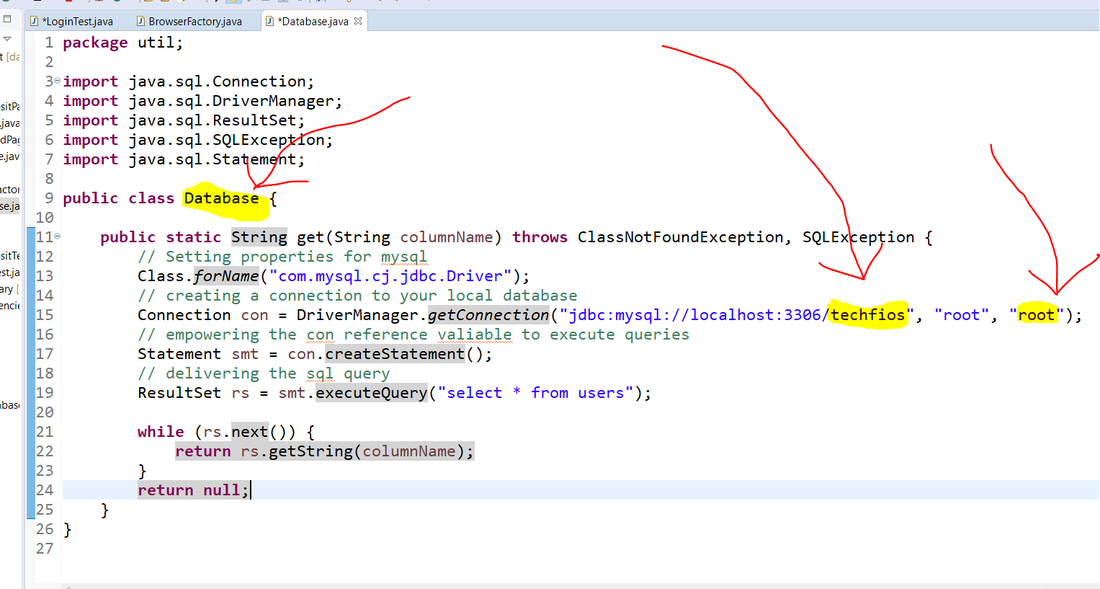
3. Create a "Database" Class in "util" package and add the following method:
<dependency>
<groupId>mysql</groupId>
<artifactId>mysql-connector-java</artifactId>
<version>8.0.16</version>
</dependency>
2. Update Maven project,
3. Create a "Database" Class in "util" package and add the following method:
public static String get(String columnName) throws ClassNotFoundException, SQLException {
// Setting properties for mysql
Class.forName("com.mysql.cj.jdbc.Driver");
// creating a connection to your local database
Connection con = DriverManager.getConnection("jdbc:mysql://localhost:3306/techfios", "root", "root");
// empowering the con reference valiable to execute queries
Statement smt = con.createStatement();
// delivering the sql query
ResultSet rs = smt.executeQuery("select * from users");
while (rs.next()) {
return rs.getString(columnName);
}
return null;
}
4. Update "techfios" with your unique database and update "root" to your provided password: (see below)
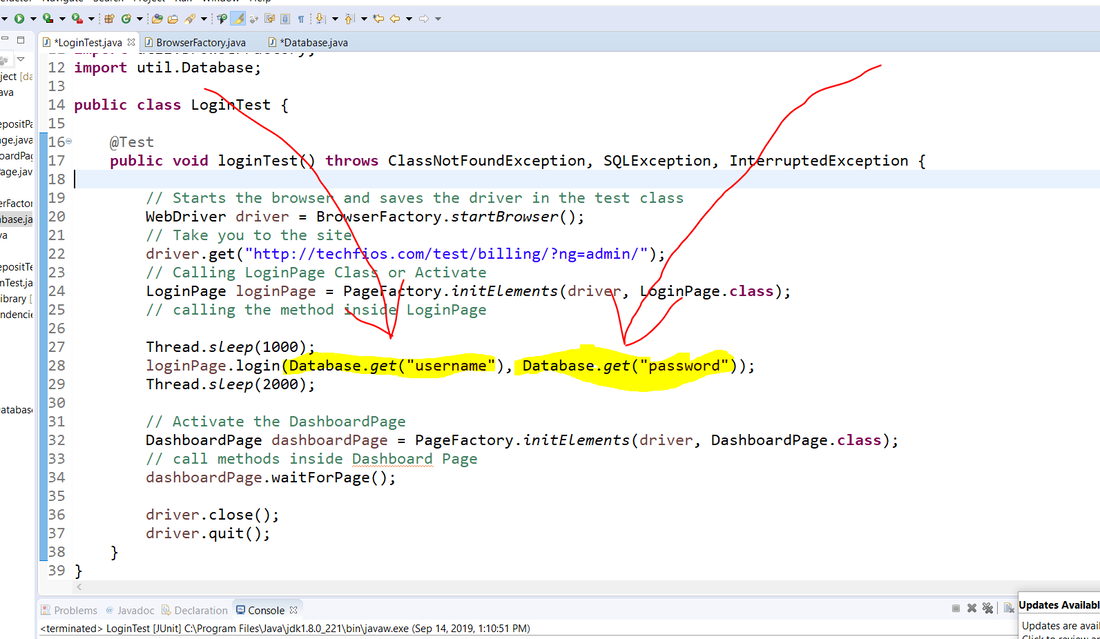
5. Call the method in your test cases: Database.get() - See below
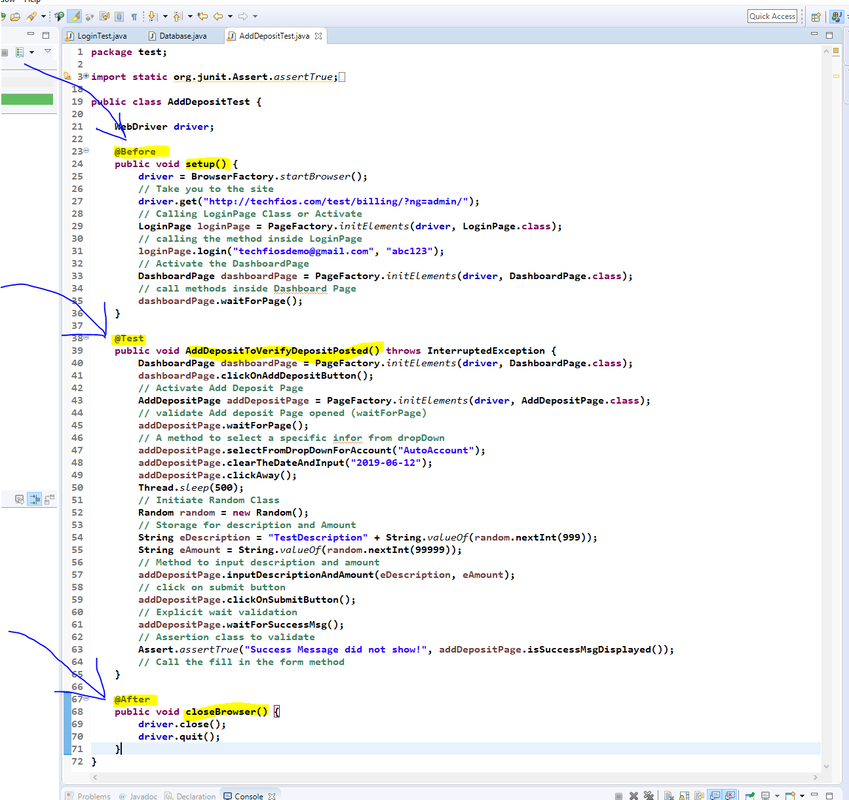
Test Annotations
@Before - A method that executes before each test method
@Test - Executes the test method
@After - Method that executes after each test method
@Test - Executes the test method
@After - Method that executes after each test method
Class Annotations:
@BeforeClass - Indicates the class annotation with this label needs to execute first
@AfterClass - Indicates the class annotation with this label needs to execute last
@BeforeClass - Indicates the class annotation with this label needs to execute first
@AfterClass - Indicates the class annotation with this label needs to execute last
Method Annotations:
@BeforeMethod - First method to execute each time before all other method executes
@AfterClass - Last method to execute each time before all other method executes
@BeforeMethod - First method to execute each time before all other method executes
@AfterClass - Last method to execute each time before all other method executes
Screen Shot
1. Must have the following dependency:"
<dependency>
<groupId>org.apache.poi</groupId>
<artifactId>poi</artifactId>
<version>3.17</version>
</dependency>
<dependency>
<groupId>org.apache.poi</groupId>
<artifactId>poi-ooxml</artifactId>
<version>3.17</version>
</dependency>
<dependency>
<groupId>org.apache.commons</groupId>
<artifactId>commons-io</artifactId>
<version>1.3.2</version>
</dependency>
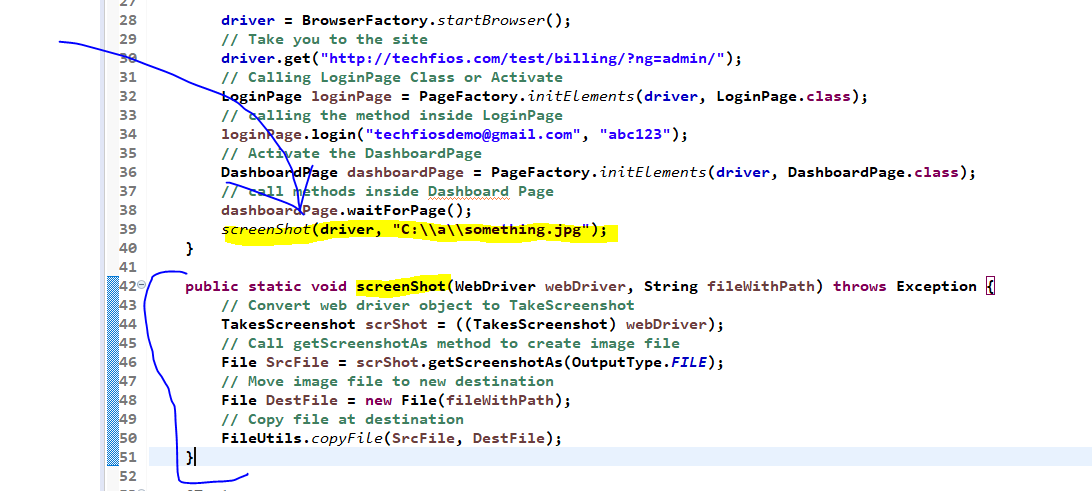
2. Use the following method:
public static void screenShot(WebDriver webDriver, String fileWithPath) throws Exception {
// Convert web driver object to TakeScreenshot
TakesScreenshot scrShot = ((TakesScreenshot) webDriver);
// Call getScreenshotAs method to create image file
File SrcFile = scrShot.getScreenshotAs(OutputType.FILE);
// Move image file to new destination
File DestFile = new File(fileWithPath);
// Copy file at destination
FileUtils.copyFile(SrcFile, DestFile);
}
2. To call the method:
screenShot(driver, "C:\\FolderName\\FileName.jpg");
<dependency>
<groupId>org.apache.poi</groupId>
<artifactId>poi</artifactId>
<version>3.17</version>
</dependency>
<dependency>
<groupId>org.apache.poi</groupId>
<artifactId>poi-ooxml</artifactId>
<version>3.17</version>
</dependency>
<dependency>
<groupId>org.apache.commons</groupId>
<artifactId>commons-io</artifactId>
<version>1.3.2</version>
</dependency>
2. Use the following method:
public static void screenShot(WebDriver webDriver, String fileWithPath) throws Exception {
// Convert web driver object to TakeScreenshot
TakesScreenshot scrShot = ((TakesScreenshot) webDriver);
// Call getScreenshotAs method to create image file
File SrcFile = scrShot.getScreenshotAs(OutputType.FILE);
// Move image file to new destination
File DestFile = new File(fileWithPath);
// Copy file at destination
FileUtils.copyFile(SrcFile, DestFile);
}
2. To call the method:
screenShot(driver, "C:\\FolderName\\FileName.jpg");
Reference: GitBash Command Line
1. Clone the project (FIRST TIME):
1. Open GitBash in a folder of your choice,
2. Type> git init - This will create a repository in your computer
3. Type> git clone [project url] - This will clone the project into your local
4. Close GitBash and verify the projected downloaded,
5. Reopen GitBash in the new cloned project folder
6. Type> mvn clean - This will update all the jar files
7. Type> mvn install - This will update all the jar files
8. Type> git status - This will show if there are changes need to be staged and committed
9. Open Eclipse, go to new, click Open Project From File System to browse to the project folder and click finish.
2. Update code and create a pull request (FOR EVERY TEST CASE):
1. Open GitBash in the folder where the project is located,
2. Type> git branch - This will show you which branch you are on
3. Type> git pull - If you are on master, this will pull the latest code
4. Type> git checkout -b [new branch name] - This will copy the master into your new branch
5. Go back to your project and write your code, then open GitBash again,
6. Type> git add . - This will add all updated files to the staging area
7. Type> git commit -m "Message goes here" - This will save all changes
8. Type> git checkout master - This will move you to master branch
9. Type> git pull - This will pull the latest master
10. Type> git checkout [your branch name] - This will move you back to your branch
11. Type> git merge master - This will bring new master code to yours to keep up-to-date
12. Type> git push -u origin [your branch name] - This will create new branch in remote and with your code,
13. Login to remote repository (GitHub or BitBucket) to manually create a pull request.
Homework
Steps:
1. Follow the steps outlined in this session to update your existing project to fetch data from database.
Shortcuts/Tricks:
“Ctrl + Shift + F + O” - Alight and remove unused imports.
“Ctrl + Alt + Down" - Duplicate the row where is the cursor is.
"Alt + Left" - Navigate back.
"Alt + Right" - Navigate forward.
“Ctrl + Alt + Down" - Duplicate the row where is the cursor is.
"Alt + Left" - Navigate back.
"Alt + Right" - Navigate forward.
